
How to edit pictures in 4 simple steps!
June 14, 2012Hello people!!! Yes, so today I'm going to tell you guys how do I actually edit all my pictures that you guys see on my blog! It's really easy and simple, thus there's only 4 steps! :D I've decided to do up this post because it's one of the most requested blog post that you guys asked for all these while, and I think if I can help you people to make your pictures look more pretty.... why not right?!
Just to let you guys know that, this is the way of how I edit my pictures for now (but I've been doing this way for 1-2 years already I guess), though the way I edit them do change over the time, throughout the years. So if you compare pictures back in maybe 2009 or even early 2010, you can see that there's quite abit of difference in the (edited) outcome of the pictures back then and now.
And I must say that, this is just a guide on how I edit my pictures, so I don't claim that it's the best way or the 'right' way that how I think you guys should edit your pictures. I'm just sharing cause there are people who wants to know, though to me I feel that there's actually no right/wrong/best way to edit any pictures, cause it's pretty much subjective to personal preference.
So if you think your methods are better, do go ahead and continue using yours, or even so, you might wanna share some tips on the comments below with everyone too! ;)
Okay, so let's start!
First of all, I'm using the software Photoshop to edit all my pictures from the very beginning when I first started blogging. So if you're using Photoshop as well, then good for you cause you can related!
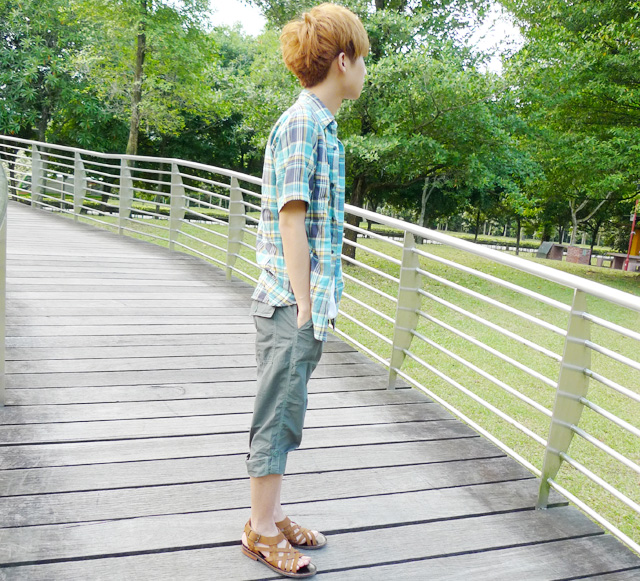
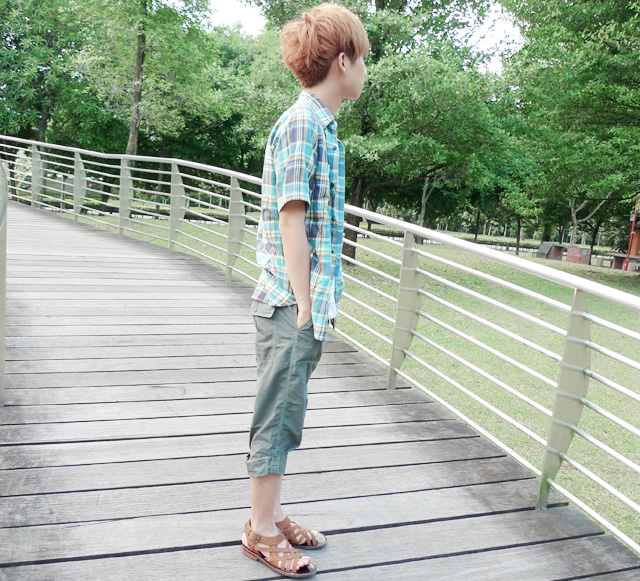
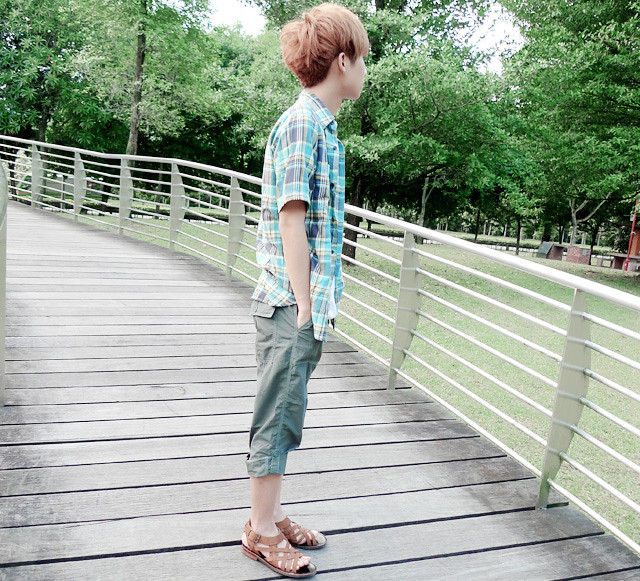
And of course different quality of pictures that you took (dark/grainy/overexposed), you will have to edit them in different ways! But now, we are talking about normal quality kind of pictures taken by camera! And below is the original picture which we are going to edit, taken by my Lumix LX3 camera:
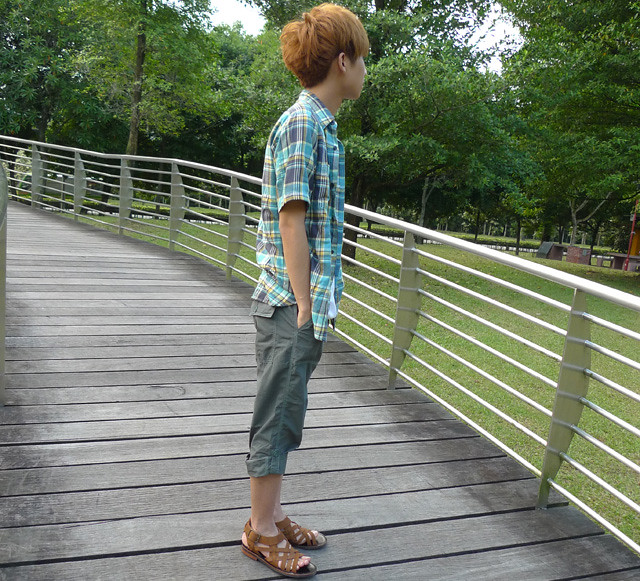
Original picture without photoshop! You can see the colour is very dull and boring!
.
.
But no fret, you can make the picture become prettier in 5 simple steps!
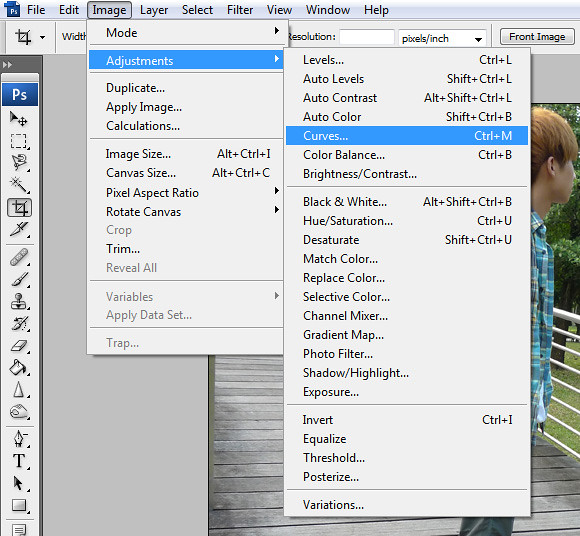
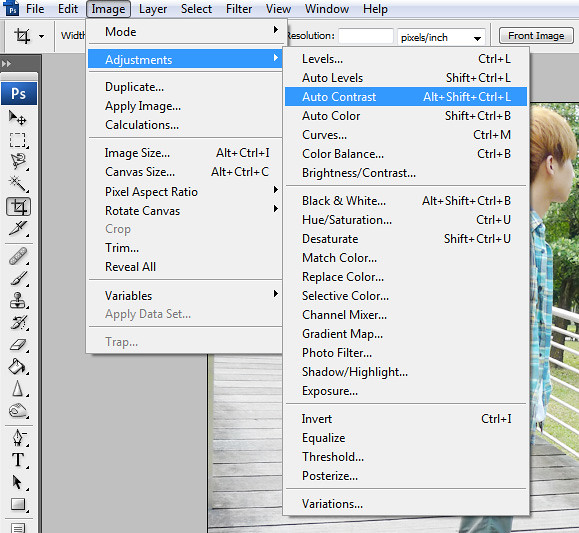
On Photoshop, click on Image, Adjustments then Curves!
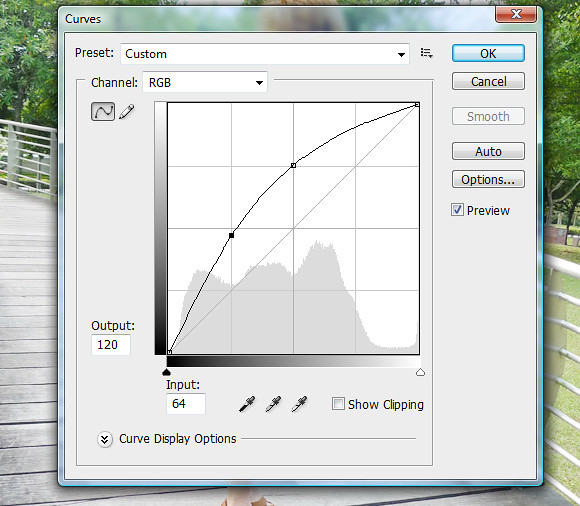
Then you adjust it to this manner which will make the picture looks brighter!
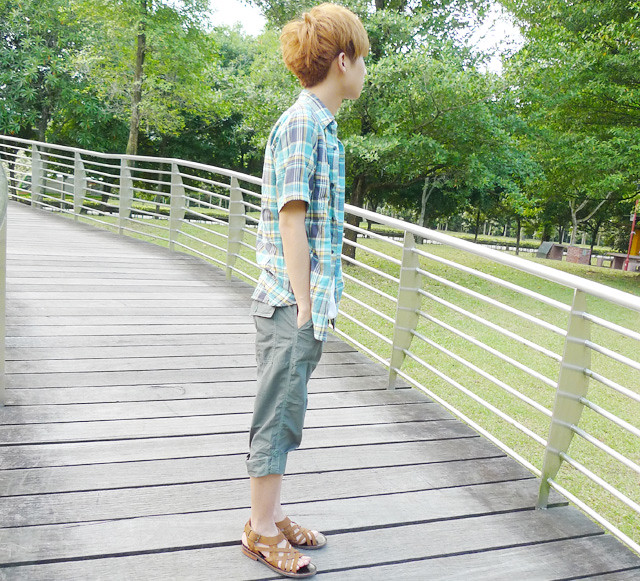
And you will get this!
.
.
As compared to the original picture:
Then click on Image again, Adjustments then Auto Contrast!
And you will get this! Not sure if you guys can see the difference but there is!
.
.
As compared to the previous picture:
To me, I think this step is important... so take note!
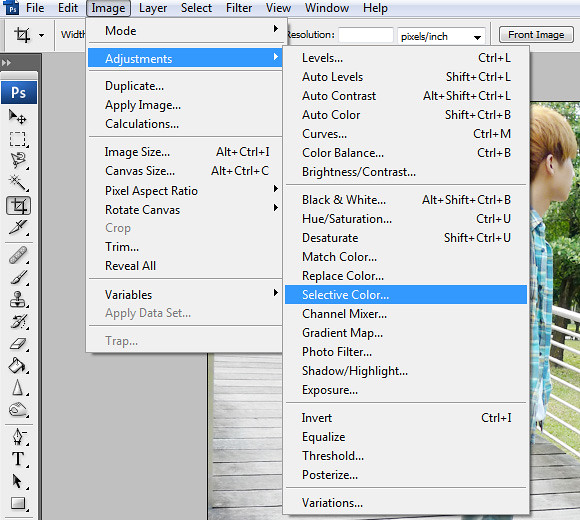
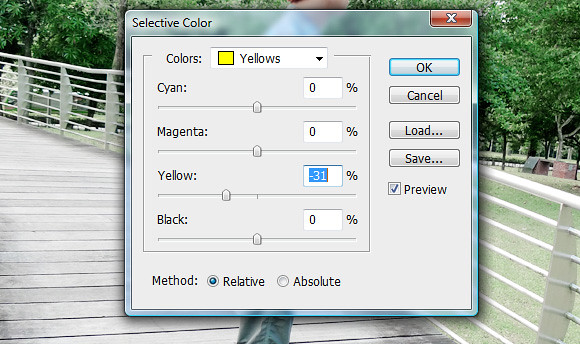
Click on Image again, Adjustments then Selective Color!
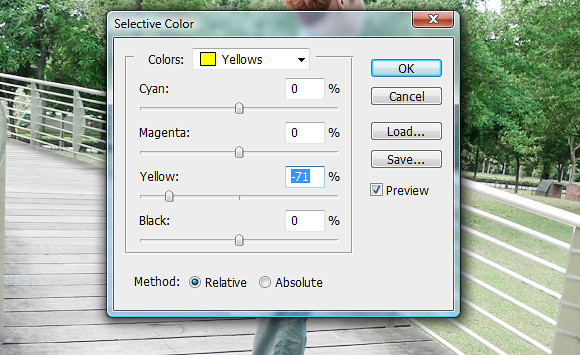
Then select from the list of colors: Yellow, and adjust it to what is it like above.
This step actually removes the heavy yellow tones we always have in the pictures which I hate!
Plus as Asians, generally our skin tones are more yellowish as well.. so this step actually removes
the yellow skin tone on us and give our skin a more rosy red colour! *Camwhorers take note*
And then you will get this!
You can see that there's a vast difference as compared to the previous picture:
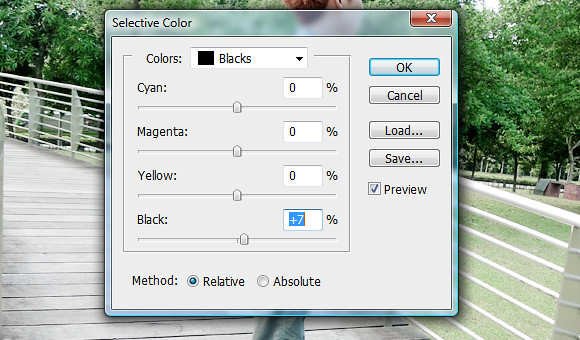
Go to Selective Color again & select from the list of colors: Black, adjust it to what it is like above. It's to darken the black colour in the picture to give a fuller colour and contrast.

Then you will get this!
.
.
As compared to the previous picture:
Usually I'll do another time for the colour yellow, cause most of the time the pictures still have too much yellow tones. But depending on the picture itself, if you think it's enough, then you can skip this step!

Then you will get this!
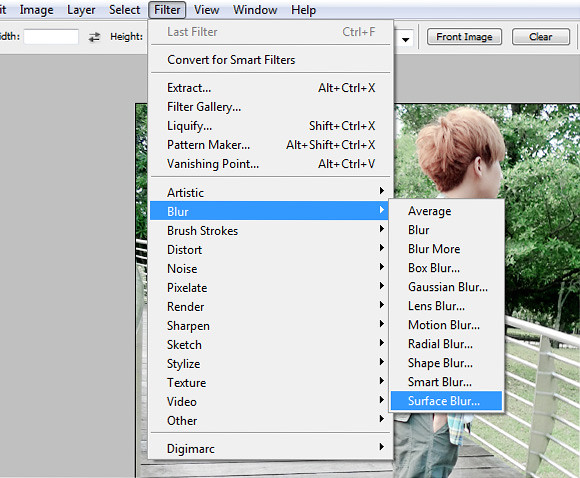
Then click on Filter, Blur then Surface Blur!
This is to actually smoothen out your picture! *Camwhorers take note as well*
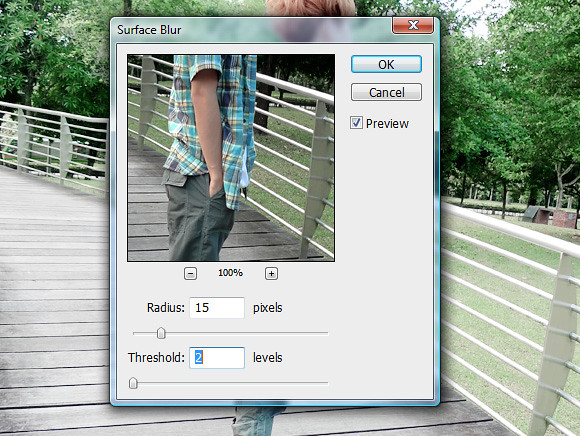
I usually stick with this setting, which just smoothen out alittle, not too much.
And you're about done!!
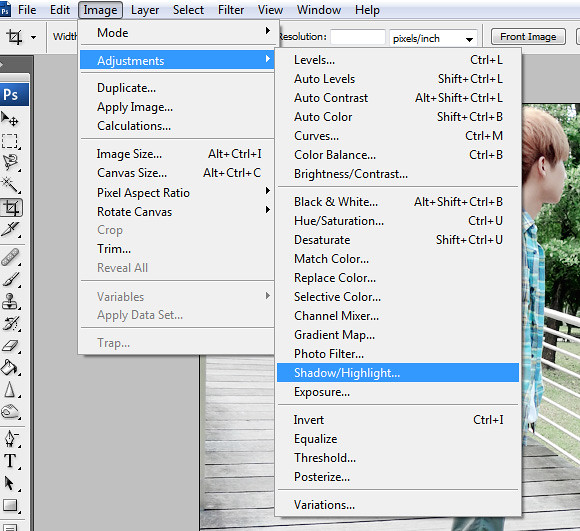
This is actually an additional step which you need not apply to all your pictures, which is to brighten shadows/dark areas in your pictures. I don't really think there's a need to use this for this picture, but for the purpose of this post, I'm just gonna show you how is it done.
So click on Image again, Adjustments then Shadow/Highlight!
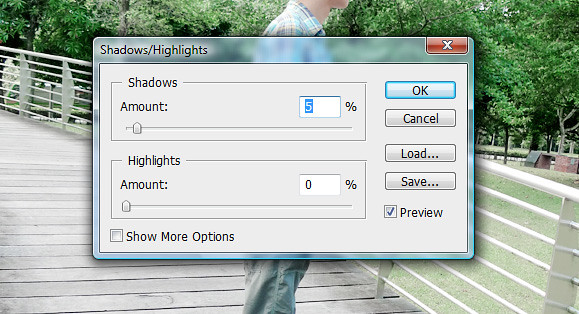
I had never used before Highlights btw, so normally I'll just adjust the Shadows!
You can adjust it to what is it like above, for normal pictures which what I always do.
But do adjust it accordingly for different pictures, as some pictures might be darker etc.

AND YOU'RE DONE!!!!!!!!!
(Not showing the comparison cause the difference isn't that obvious enough to be really seen,
it's just alittle brighter though, as this picture isn't really a good example for this step)
.
.
.
Here's the comparison of the before (original) & after photoshop picture:
Original picture!
After editing with photoshop!!!!
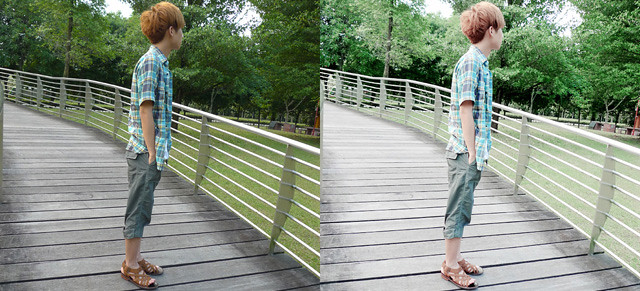
Side by side comparison!! Huge difference right??!
You can see that the picture appraently become much chioer right, and it's not that dull and boring anymore! So that's the reason why most of the bloggers (including myself) take time and effort to edit their pictures before posting them up! But of course, the way we edit them are different.....
Okay, that's all from me for now!
Hope this post will help you guys alittle, and have fun editing all your pictures k! :D

11 comments
Awesome tutorial, it will try it next time.
ReplyDeleteI love photoshop.
Wow thank you :3 It was very intereresting !!
ReplyDeleteI've always wondered how your pictures look so good. Thanks for the tutorial!
ReplyDeleteO..k...i tried that on my food pictures =D
ReplyDeletethank you for sharing, i always want to know that.
ReplyDeleteyou're awesome ben <3
ReplyDeleteThanks for the tutorial! Now I need to find my sister's Photoshop CD before she gets me a new camera. :)
ReplyDeletegood try^ u should try to improve^ most of ur photoshop pics are overexpose^
ReplyDeleteno wonder! All your photos are so nice :D
ReplyDeleteA lot of your photos are over exposed, you could still attain contrast and depth without making your pictures bright (just to hide flaws)
ReplyDeleteWhat is your photoshop program name? == U didnt included
ReplyDelete